|
I've been layin' low the past couple of weeks, but don't fret! I stocked up on plenty of photos to keep you guys updated! Here are a few appointments I had over the past couple weeks... 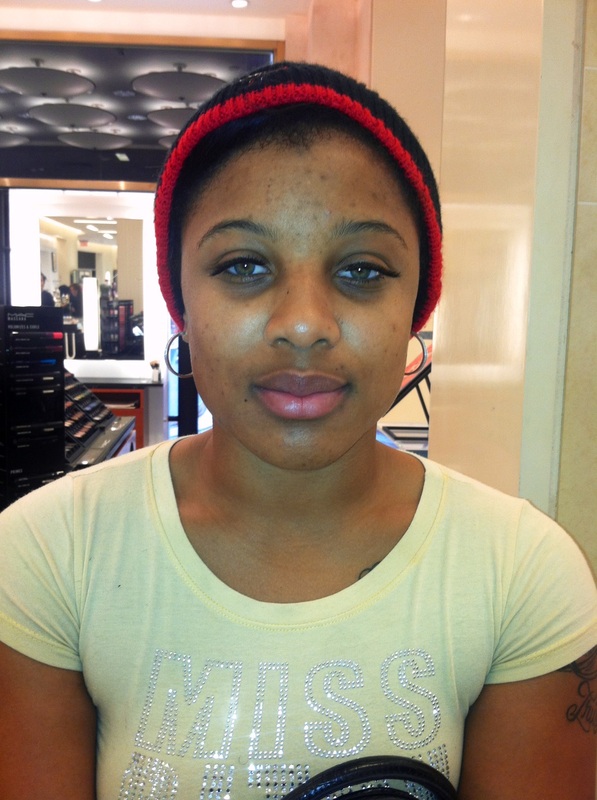
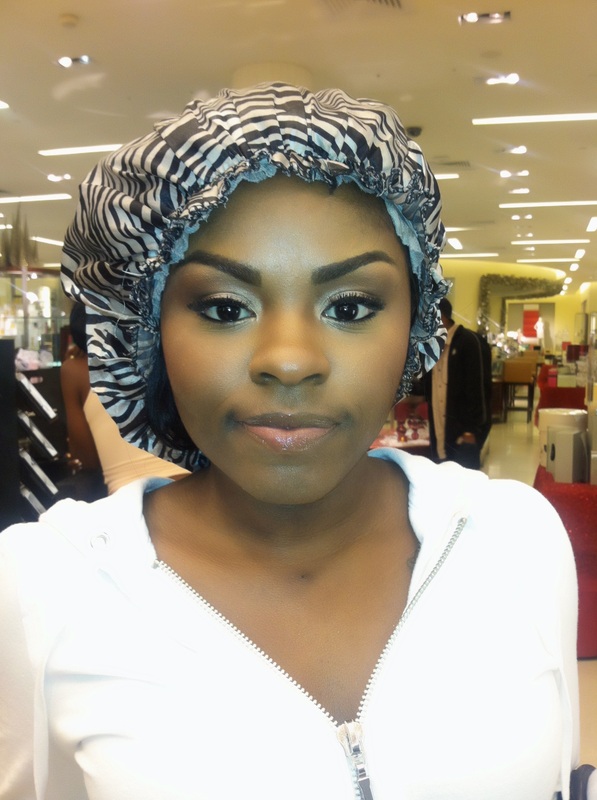
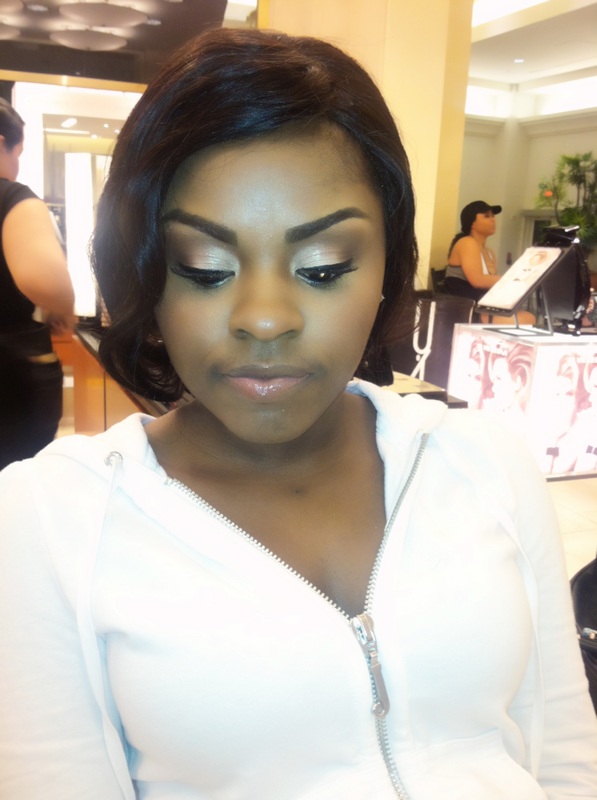
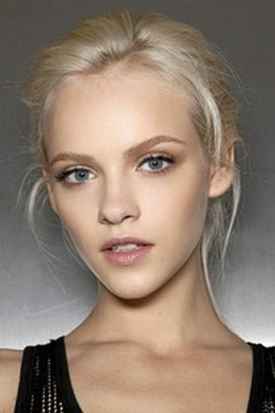
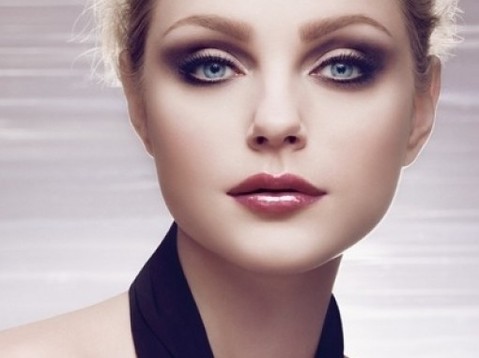
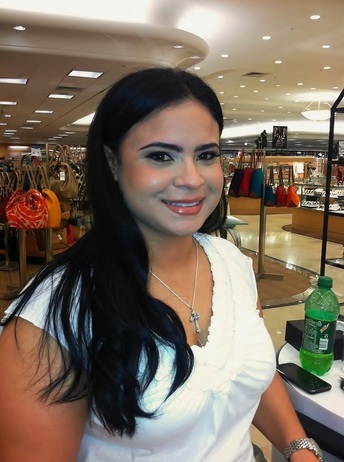
This is Raquel, don't even get me started on those eyes of hers!! She never wears any makeup, so we decided to go big or go home! We were both really pleased with the end result... 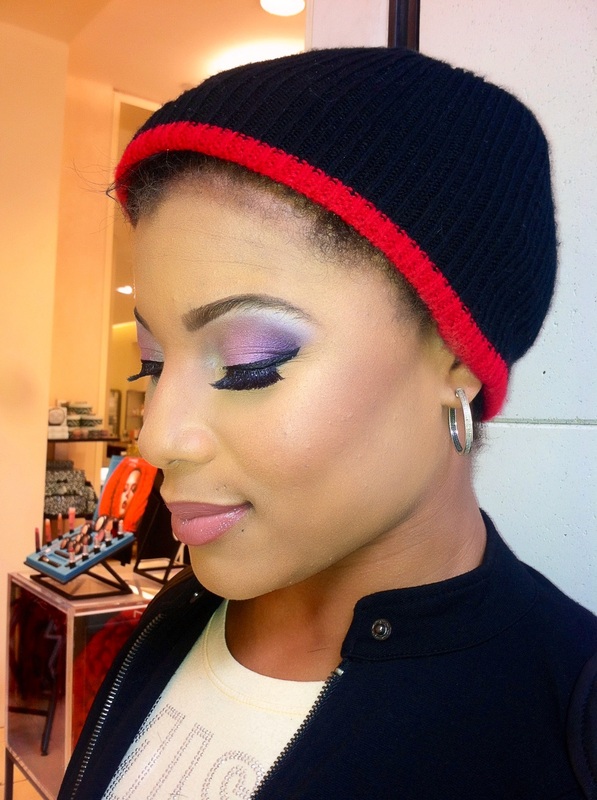

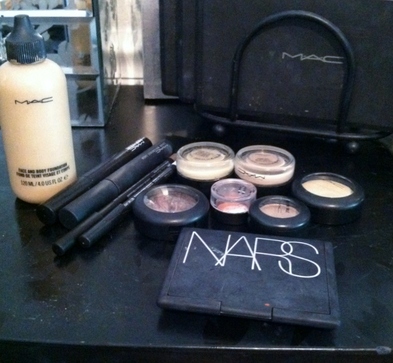
Raquel struggled with her skin in the past, which left her with some discoloration. After applying moisturizer and primer I perfected her skin with full coverage foundation and concealer. To keep things from being too heavy I dusted her with a light layer of loose powder. We went for bold color on the eyes with a light pink lip to compliment, and a heavy contour to show off her cheeks. I recommended she try MAC's Green Gel Cleanser as her daily cleanser followed by the Volcanic Ash Exfoliator 2-3x a week to control her oil. As a moisturizer we chose Oil Control Lotion, and I also recommended our brightening serum to help brighten and even her complexion. Skin care is the building block of any good makeup application! I can't stress enough how much a good skin care regimen will improve to look and wear of your makeup! If you struggle with discoloration from scarring or sun damage look for products with yeast, vitamin c, and green tea. Products Used: Oil Control Lotion followed by Prep & Prime Natural Radiance Studio Fix Fluid Studio Finish Concealer Contour Creme Select Sheer Loose Powder in 2 shades - one under the eyes to set her highlight, and one that matched her skin all over. Gentle Blush Shell Creme Colour Base Spiked Brow Pencil Soft Ochre Paint Pot From light to dark: Nylon, Fushia pigment, Violet pigment, Fig 1 Bisque as a highlight Boot black liner & Smolder on the waterline **She already had on lashes** Viva Glam 5 lipstick Whirl Liner Mineral Tinted Lip Balm in Stay Warm 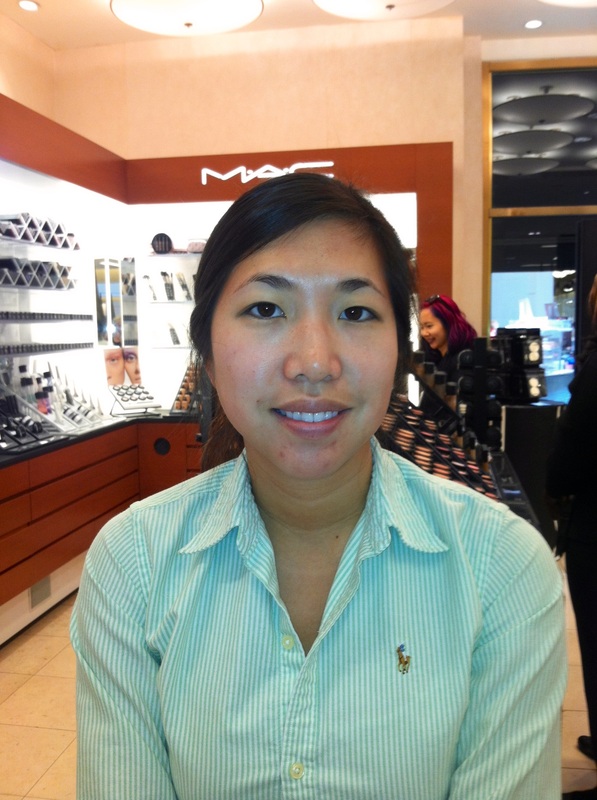
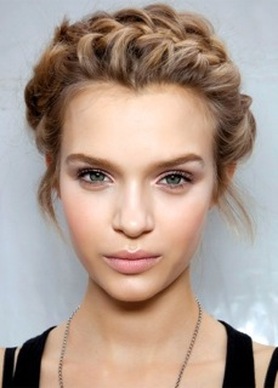
Winny came in for her wedding last week (CONGRATS!) She wanted a very natural, soft, subtle look... 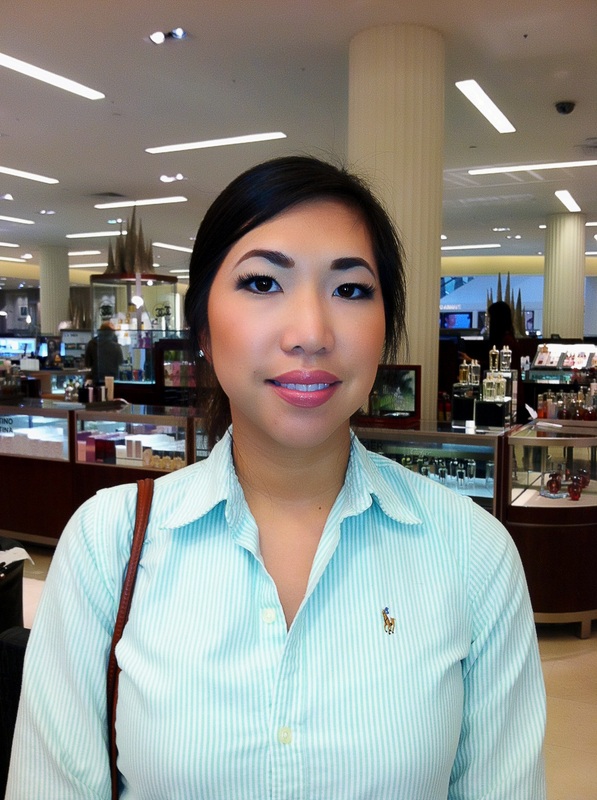
Everything was kept very lightweight and minimal! Perfect for a small intimate wedding! I can't wait to see her professional photos...
Products Used: Prep & Prime Skin Face & Body Foundation Select Cover Up Select Sheer Pressed Spiked Brow Pencil Soft Ochre Paint Pot Sweet Satisfaction Prolongwear Eyeshadow Brown Down Blacktrack Fluidline #36 lashes Zoom Waterfast Lash Give Me Sun Bronzer Warm Soul Blush Soar Lipliner Syrup Lipstick Viva Glam 6 Gloss
0 Comments
Here's one of my lovely clients from Saturday night! She was so sweet and GORGEOUS! She wanted a natural, defined, "Beyonce/Gabrielle Union" inspired look. I used all neutral colors on her eyes, a rosy blush, and really focused on perfecting her skin and brows. 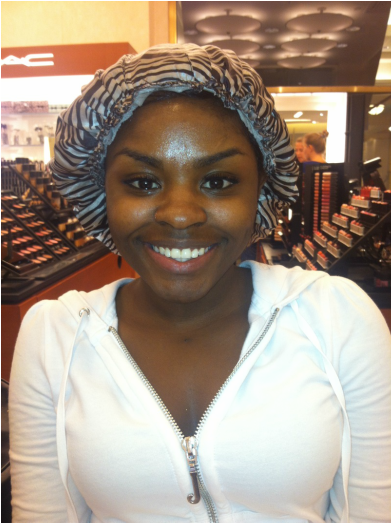

Here's a quick list of what we used:
Prep & Prime Skin Spiked Brow Pencil Bamboom Paint Pot Naked Pigment, Brown down, Embark, and Bamboo shadows Pointblack Liquid liner Smolder Eye Kohl Studio Tech Foundation Studio Finish Concealer Sculpting Cream in "Richly Honed" Select sheer loose - in two colors. A lighter shade under her eyes and through the center of her face, and a deeper shade around the perimeter of her face. Love Joy Mineralize Blush Clear Lipglass Hope everyone had a great weekend! Leave me some comments with questions or topics you would like me to cover on here!!!! xoxo 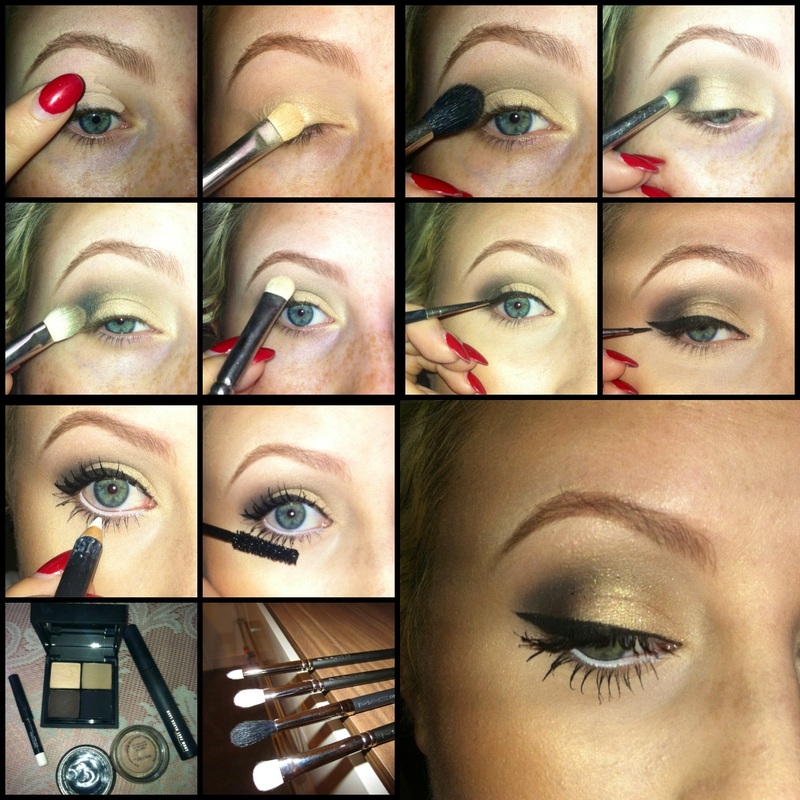
Ok Y'all! Here's my first go at a Pictorial! I used the Jungle Camouflage palette from the Corrine Roitfeld collection, you may still be able to find it at your local MAC counter, or you can find it on the MAC website under "Face Kits." This is an AMAZING product. It has all of the necessary colors to create everything from a natural eye to a very dramatic smokey eye. Under the eyeshadows lies a creme bronzer that can be used to contour or as a bronzer/blush. Definitely a new favorite of mine, and it has a great price point of $44!
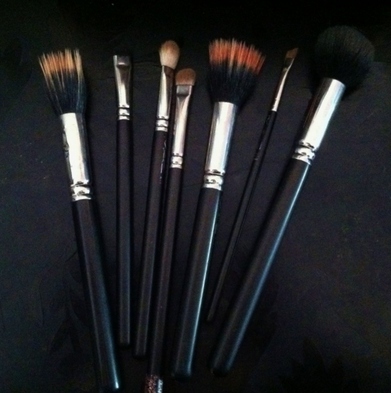
Step by step: 1. Prime entire eye. I used MAC Painterly Paint Pot. You can use a concealer brush, I prefer my finger. This step is a MUST! Skipping out on primer can cause your eyeshadow and liner to crease and fade! 2. Using a shadow brush, like the 239 from MAC, pack on the lightest shade all over the lid. The trick here is to press or tap the shadow on to the lid rather than use a sweeping motion. 3. Using the lightest brown shade and a 224 brush I swept the shadow across my crease. If you don't know where that is, or you don't have a crease, follow the shape of your eye socket. 4. Take the dark brown shade and a stiff pencil brush, I used #219, and pack the shadow on the outside corner of the eye, also known as the "Outer V." Don't worry about blending yet, just apply the shadow until it is as dark as you want it. 5. NOW BLEND! I prefer a 217 brush. Focus on blending just the dark brown shade. If you run the brush across your entire eye it will muddle all the colors together and it will all look like one color. I like to just work in small circles over the area that needs blending. 6. Highlight under the brow with the lightest shade. 7,8,9. Liner: I used Blacktrack Fluildline and a 210 brush. First I lined my eyelid straight across. Once I had a good line I created a wing on the outer corner. I lined my waterline with Fascinating Kohl from MAC. White eyeliner is great for making the eyes look bigger, well rested, and to reduce redness. 10. Finish with mascara! I chose Zoom Fast Black Lash. Let me know how it works out for you! I've been on a bit of a hiatus lately, but as of tonight I'm back in action! As most of you know, I recently transferred to another MAC that is a bit closer to my house...Can't beat a five minute commute! Between transferring to a new store, and the chaos of every day life, my blog fell to the bottom of my to do list. Womp. Womp... So, to get back in the swing of things, here are a few photos from shoots, weddings, and of course HALLOWEEN! 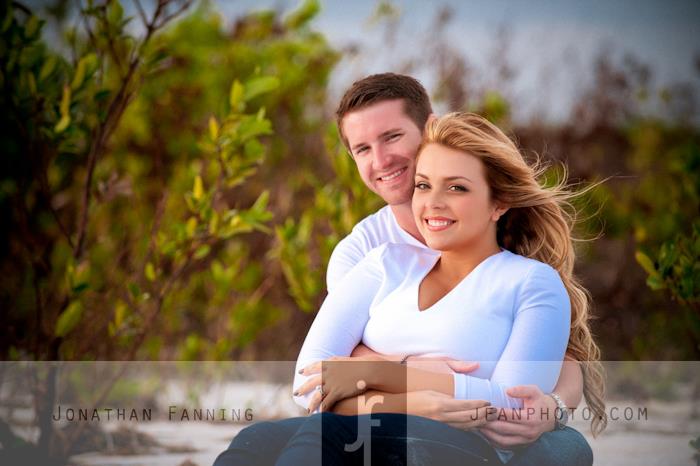    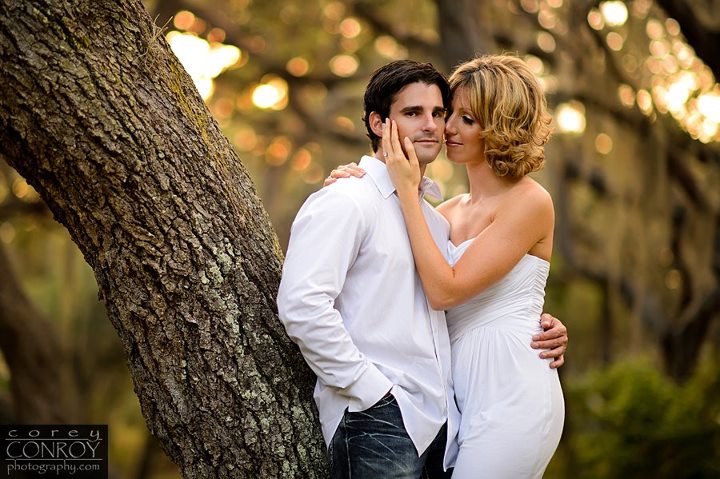 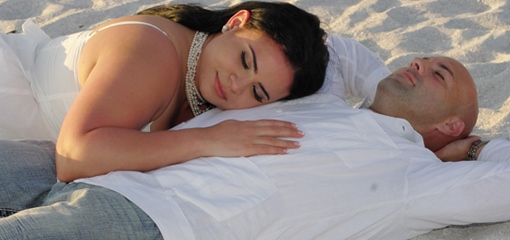   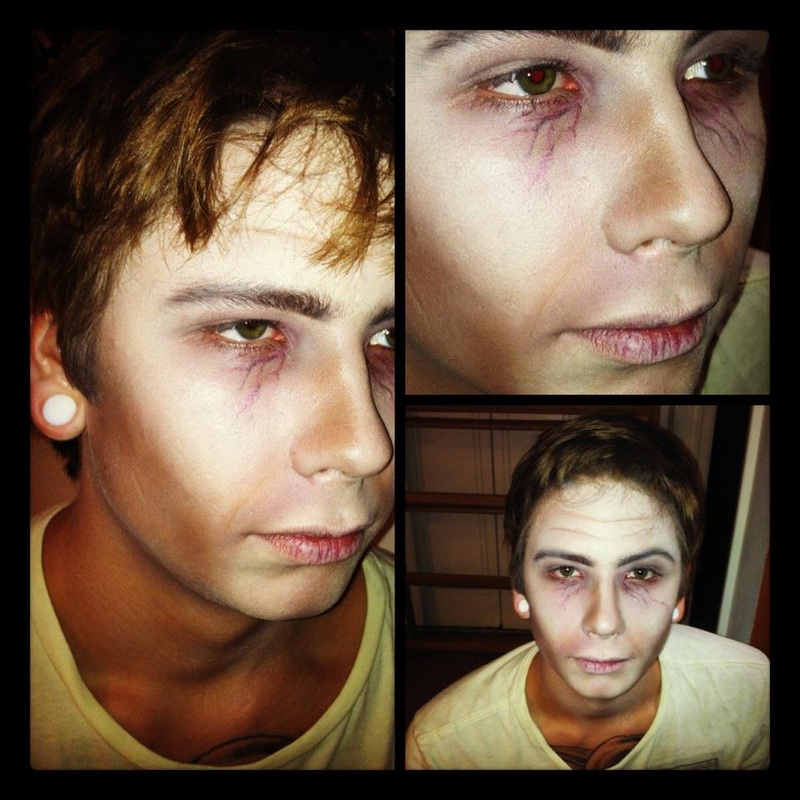 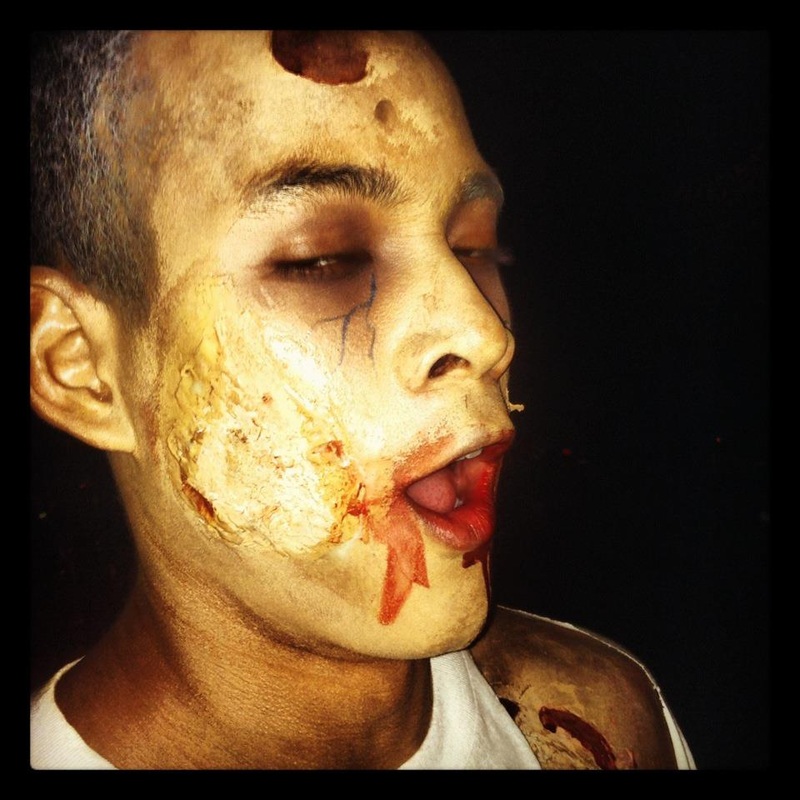  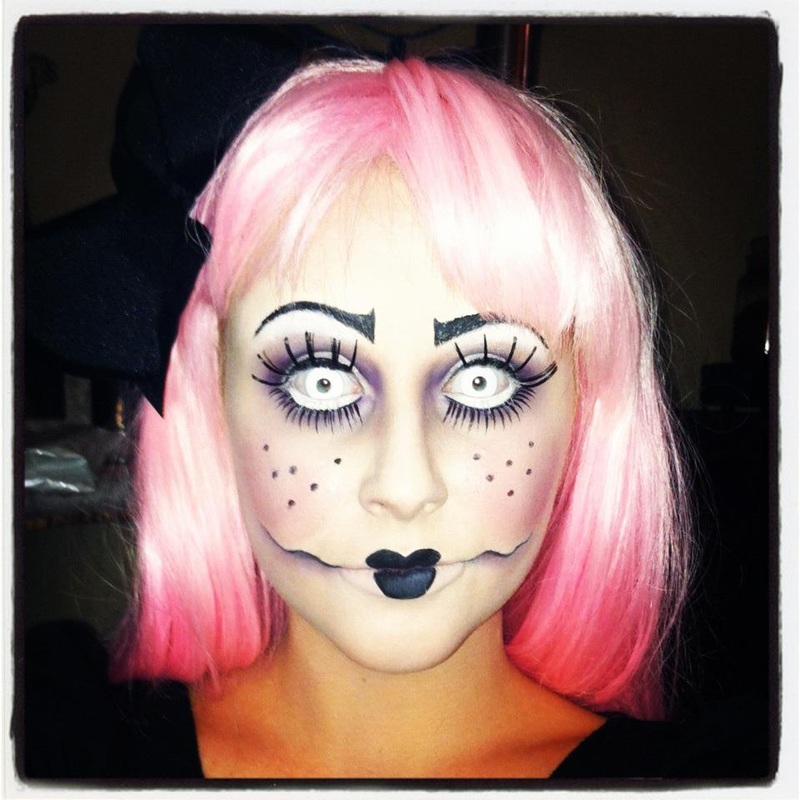  Halloween was great! It is, understandably, my favorite holiday of the year! Although, I'm sure most makeup artists would agree with me on that one. Since Halloween fell on a Wednesday this year I was fortunate enough to have Halloween appointments almost every day of the week leading up to the 31st.
Matt, my boyfriend, went as Jack the Ripper (seen above). Since his identity is unknown I decided to make him look aged, tired, and "corpse-like." We used a light foundation all over, and I contoured him heavily with cream and powder products. The new MAC sculpting creams worked great for this project! I was able to contour his face as well as create lines and wrinkles. To set the contours and to give his eyes a tired look I used grey and mauve toned eyeshadows. Quarry and Haux by MAC were ideal shades for the look we were going for! For the veins under his eyes I used a cream blush from MAC called "tea petal." Eli was SUPPOSED to be a vampire! He showed up at my house with a last minute change of plans: Zombie makeup. Luckily, he's my friend....and I had a latex piece of "rotten flesh" lying around. Using spirit gum I attached the piece to his cheek and blended out the edges by building up a few layers of liquid latex. I also put a very thin layer of liquid latex across his forehead, this later served as peeling flesh. Once that was completely dry I applied a light colored full coverage foundation over his face, ears, chest, and hair. Then I darkened they eyelid and area under the eye to give the illusion of a deep-set, hollow eye. I added a few veins using a blue paint pot, and finally set everything with a loose powder. To "zombiefy" his skin I tugged and pulled at the liquid latex on his forehead to create "holes" and "peeling flesh." Using MAC contour creme and fake blood I colored the wounds accordingly. Earlier in the week I decided to play around with some makeup during a fit of boredom. I took inspiration from my Halloween costume last year, as well as several other doll makeup images found on Pintrest and Google. The first thing I did was conceal my eyebrows using a glue stick and concealer. There are a ton of tutorials on Youtube that give step by step instructions on how to do that! For my skin I mixed Vanilla pigment with a light full coverage foundation, this gave the skin a plastic shiny look. I set the foundation with translucent powder and sprayed Fix + to maintain a dewy finish. After the skin was done I drew on an exaggerated cartoon like eyebrow using Blacktrack Fluidline. I used matte purple shades on the eyes and made sure to apply the makeup in a very round shape to make the eyes look big and doll-like. I Finished the eyes with eyeliner, black on top and white kohl on bottom, and false lashes. I applied the lower set of lashes below my natural lashline to enlarge my eyes. I applied a bubblegum pink blush on the apples of my cheeks in a circular shape and added some freckles with my Fluidline. Still using the Fluidline, I drew a glasgow grin and a cupie style lip. What did you dress up as for Halloween? When it comes to makeup "natural" and "neutral" are two classifications that I hear frequently. Although the terms can tie in together and describe a similar look, that is not always the case. Natural makeup defines a look that is essentially nude. Think "no makeup makeup," or "second skin makeup." The color palette includes flesh tones, or colors you would naturally find in the skin without any makeup applied. Focus on highlighting and perfecting the skin to give it a "fresh faced" look. 

Lauren Conrad is a perfect example of natural makeup!
By definition neutral means "no color." A neutral makeup look could include muted shades of grey, earth tones, flesh tones, and shades from light to dark. Textures can be anything from matte to metallic. Neutral makeup doesn't necessarily need to be soft or light. 
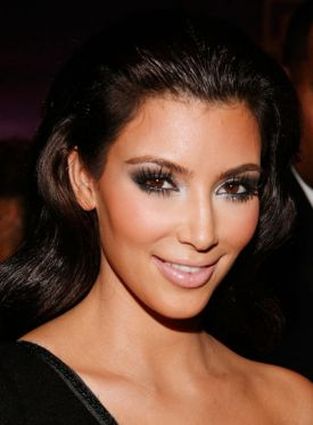
A majority of red carpet looks are kept neutral. Kim Kardashian is known for her neutral colored smokey eyes.

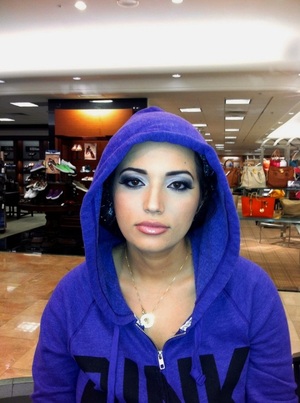
This poor woman braved tropical storm Debby in order to get her makeup done for a family member's wedding! Talk about devoted...
Here's what I used: Eyes- Brun (eyebrows) Painterly paint pot Nylon (lid) Weathered Prolongwear eyeshadow (crease) Typographic (outer corner) Blacktrack (upper and lower lashline and waterline) Zoom waterfast lash #36 lashes Face: I did a "skin cocktail" by mixing two pumps of Studio Fix Fluid with one pump of Prep and Prime Skin and a few drops of Pink Rebel Lusterdrops. (My lovely coworker Tiffany gave me the idea!) Prolongwear Concealer (under eyes, down center of nose, forehead, around lips) Select Sheer pressed powder Cheeks: Cubic blush Give Me Sun mineral bronzer Lips: Blankety lipstick Nice N' Spicy prolongwear liner Baby Sparks dazzleglass Let's face it, not everyone wants to tote around a makeup bag with 50 different products in it, it's just not practical. So today I gave myself a challenge: Create a polished makeup look using as few products as possible. Here's the before, after, and products I chose: 
Woof!


I went with a natural/neutral color scheme and kept the coverage pretty sheer. I applied Prep & Prime skin beforehand to enhance the wear of the makeup and give a mild amount of moisture to the skin. For foundation I chose Face & Body foundation, which is great for a light, natural coverage. I skipped powder today in order to leave more of a shine to the skin, and went over the high planes of my face with Pearl Cream Colour Base to bring out the highlights. Nars Laguna bronzer was my contour, which I also used as a crease color instead of an eyeshadow. For the eyes I used Painterly Paint Pot, two limited edition shadows in neautral tones, and fascinating eye kohl. White eye kohl is a necessity for any natural/neutral makeup look! It opens the eye and cancels out any redness on the the water line! I filled in my brows with Dirty Blonde brow pencil and finished with mascara. The Paint Pot doubled as an under eye concealer; and I used Keep It Loose Casual Colour on my cheeks and lips! Ta-Da! Quick, low maintenece makeup!
My first client today was on her way to have her engagement photos taken, and I jumped on the opportunity to take a few photos of my own! Clearly I'm not a photographer, but here are her before and after photos: 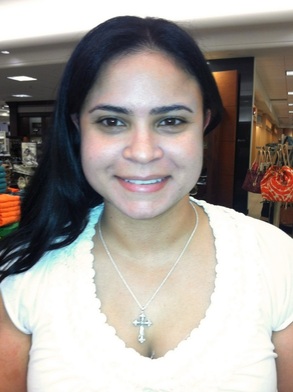
I'm a total sucker for beauty makeup, especially bridal makeup. On Janette we decided to go with light brown shades on the eyes, and keep the lashes and skin the main focus. I used #4 lashes from MAC, which are great for brides! They are natural, but still elegant and sexy.
We kept her foundation light and matte. Satin textures photograph beautifully, but for a beach shoot in Florida we needed as much shine control as possible! I used one sheer coat of prolongwear concealer as a foundation and Prep & Prime highlighter under the eyes and on the high planes of her face. I finished off the skin with a light dusting of mineral powder. For cheek color I used Keep It Loose causual colour from MAC. These are AMAZING cream blushes that double as a lip color. Not only are they convenient, but they are practical and simple to use. Creamy products always look nice in photos, and they give the skin a nice glow without being too shiny. On her lips I used Modesty lipstick, Nice N' Spicy Prolongwear Lipliner, and Big Baby Plushglass. I can't wait to see the professional photos! |
Lindsay TravisMy attempt at keeping up with the times... Archives
June 2016
Categories
All
|
 RSS Feed